
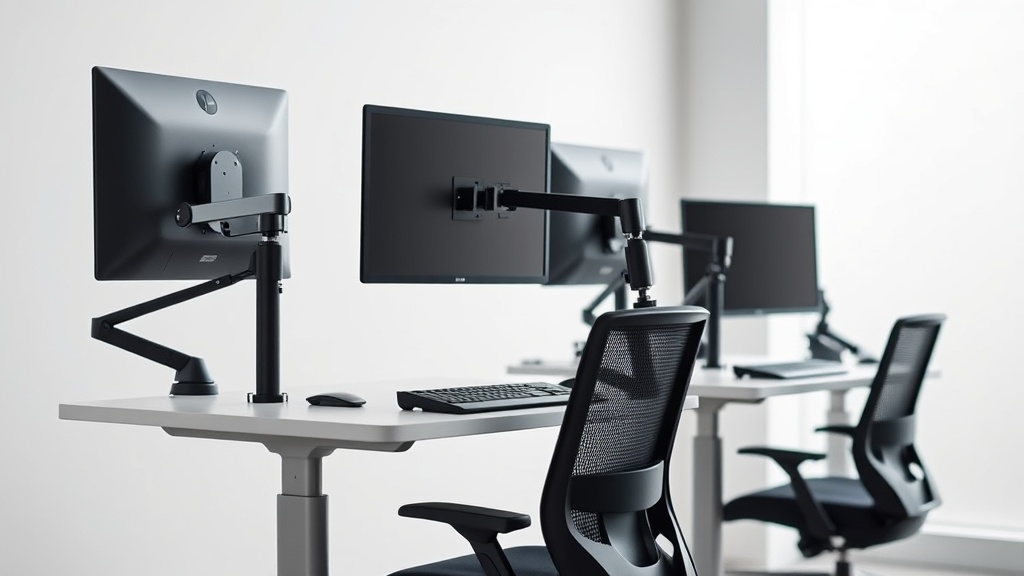
If your desk feels cramped and cluttered despite having a decent-sized workspace, poorly managed monitor setup might be to blame. Bulky monitor stands, unwieldy cables, and inefficient screen positioning can sap your productivity and cause discomfort after long hours of desk work. Moving to a monitor arm promises cleaner space and ergonomic benefits, but installing one can bring its own headaches without practical tips. This guide walks you through tried-and-true tricks to install your monitor arm smoothly and keep your desk clutter-free for 8+ hours of comfortable work.
What is a Monitor Arm?
A monitor arm is an adjustable mounting device that attaches to your desk or wall to hold your monitor off the desktop surface. Unlike fixed monitor stands, arms offer height, tilt, swivel, and sometimes rotation adjustments, enabling you to place your screen exactly where it’s comfortable for your eyes and posture. This flexibility supports better ergonomics, reducing neck and eye strain, and freeing up valuable desk real estate.
See also: Monitor Arm Cable Management Solutions for a Tidy Workspace
How Monitor Arm Installation Works
Most monitor arms mount to your desk via one of two methods:
-
Clamp mount: The arm clamps around the edge of the desk, secured by a bolt that you hand-tighten. This method is easier to install and remove but needs a sturdy desk edge that’s at least 0.75” thick.
-
Grommet mount: The arm installs through a hole drilled in the desk (typically 2” in diameter). This method offers a more permanent, cleaner setup and is ideal for desks that support cable management from below.
When to Use a Monitor Arm
Consider a monitor arm if you:
- Work long hours and want to optimize neck and back posture.
- Need to clear desk space for writing, secondary devices, or just a cleaner aesthetic.
- Use dual or multiple monitors and want flexible positioning.
- Have a smaller desk that benefits from vertical space use.
- Deal with glare or awkward screen angles that fixed stands don’t resolve.
Key Installation Tricks for a Clutter-Free Desk
1. Choose the Right Mount Type for Your Desk
- Measure your desk edge thickness and confirm suitability for clamp mount.
- If drilling is possible and your desk material permits, grommet mounting offers a cleaner look and stronger support.
- Consider desk material—particleboard or thin laminate desks may crumble under clamps or drilling.
2. Prepare Your Workspace and Tools
- Clear your desk to prevent accidents during installation.
- Have a screwdriver, Allen keys (often included), measuring tape, and level ready.
- Use a small flashlight or smartphone light to check underneath or behind your desk if needed.
3. Plan Monitor Placement Mindfully
- Determine ideal eye level: top of the monitor should align with or be slightly below eye height when sitting.
- Maintain an arm’s length distance (20-30 inches) between eyes and screen.
- For dual monitors, angle inward to reduce neck twisting.
- Use seat depth and chair height as reference points to assess correct arm height adjustment range.
4. Secure Your Arm Firmly Without Over-tightening
- Clamp mounts: tighten just enough to prevent movement but avoid damaging desk finish.
- Grommet mounts: double-check bolt alignment and ensure washers and spacers are correctly placed to prevent wobble.
- Test arm stability before mounting the monitor.
5. Manage Cable Clutter
- Use built-in cable clips or sleeves on arms for neat routing.
- Long cables can wrap around the arm joints but avoid stretching.
- Add adhesive cable anchors under the desk for power and peripherals.
- Group and label your cables for future maintenance ease.
6. Adjust and Pressure-Test Your Monitor
- Once mounted, adjust tilt, height, and swivel to suit your sitting posture.
- Use a basic pressure mapping strategy by noting where your forearms rest when typing or mousing and adjust armrest/desk height accordingly.
- Sit in your usual work setup and tweak monitor position to avoid neck strain after hour one, three, and six.
Common Pitfalls to Avoid
| Problem | Cause | Solution |
|---|---|---|
| Desk surface damage | Over-tightening clamps or mounts | Tighten just enough; add protective pads if needed |
| Wobbly monitor arm | Poor mounting surface or loose bolts | Check desk compatibility; retighten/replace bolts |
| Insufficient arm adjustment range | Arm incompatible with monitor size or user height | Buy arms with 4D travel features (height, tilt, swivel, rotation) |
| Cable tangling | No cable management or overly long cables | Use cable clips/sleeves; shorten cables with ties |
| Uncomfortable viewing angle | Improper initial positioning | Measure eye level and seat depth before installation; adjust regularly |
Monitor Arm Feature Comparison
| Feature | Clamp Mount | Grommet Mount | Wall Mount |
|---|---|---|---|
| Installation Ease | Easy; no desk modification | Requires drilling; professional help suggested | Moderate; requires wall studs and anchors |
| Desk Compatibility | Needs sturdy, thick edge | Best for desks that allow drilling | Flexible; good for tight floor spaces |
| Stability | Moderate; may shift if loose | High; fixed securely | High; mounted to solid structures |
| Cable Management | Limited to arm clips | Better; can incorporate under-desk guides | Typically best cable routing options |
| Removal | Simple removal | Permanent | Semi-permanent; wall repair may be needed |
Frequently Asked Questions
Q: Will a monitor arm fit any monitor?
A: Most arms support VESA mounting standards (75x75mm or 100x100mm). Check your monitor’s compatibility and weight limit before purchase.
Q: How do I prevent my desk from getting scratched by the clamp?
A: Use protective pads or felt strips between clamp and desk surface. Tighten clamps adequately but avoid excessive force.
Q: Can I install a monitor arm myself?
A: Yes, most come with instructions and tools. Clamp mounts are easier; grommet mounts may need drilling, so consider your DIY comfort level.
Installing a monitor arm well requires more than just tightening a clamp and hanging your screen. Thoughtfully preparing your desk, choosing the right mounting method, managing cables, and adjusting the arm to your exact ergonomic needs are essential steps. The payoff is a clutter-free, comfortable workspace that supports productive, pain-free workdays. Use these practical tips to get it right the first time and enjoy a cleaner, healthier desk setup.
Related reading
- Monitor Arm Cable Management Solutions for a Tidy Workspace
- Monitor Arms That Boost Desk Space and Posture Alignment
- 33. The actual ergonomic setup checklist: 10 minutes, permanent fix
- Selecting the Ideal Monitor Arm for Flexible Positioning
- Best Chairwise Monitor Arms for Multi-Monitor Workstations
Our picks worth a closer look
- VIVO Dual LCD Monitor Desk Mount Stand for Two ScreensCheck on Amazon → — see current price and specs.
- ErgoFocus Heavy Duty Single Monitor Mount for Max 49 inch, Hold 7.7 to 44 lbs UlCheck on Amazon → — see current price and specs.
- HUANUO FlowLift™ Pro Monitor Arm for 13–32’ Screens, MechaSpring Monitor Mount, Check on Amazon → — see current price and specs.
- VIVO Dual Pneumatic Arm Ultra-Wide Monitor Mount for up to 35 inch Screens, HoldCheck on Amazon → — see current price and specs.
- FlexiSpot E7 Pro Plus Electric Standing Desk 55x28Check on Amazon → — see current price and specs.