
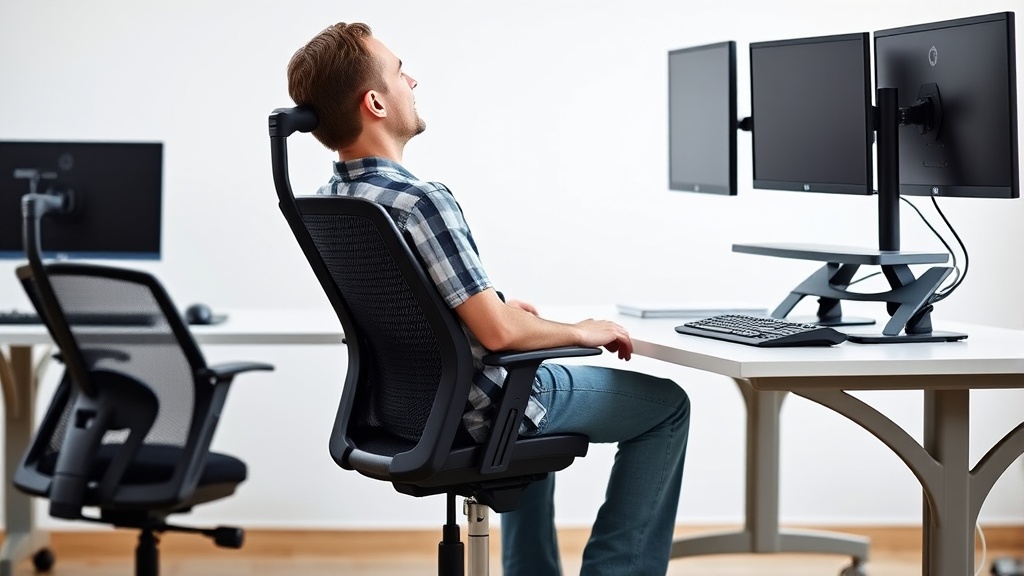
Lower back pain at your desk can be stubborn and distracting. It sneaks up hours into a workday, often after the first few weeks of a new job or a subtle change in your workspace setup. The root causes usually come down to how your chair fits you, the support it offers, and whether your posture is held comfortably over eight hours. This article focuses on three practical fixes that can genuinely reduce or eliminate lower back pain when you’re seated for work—based on measurable ergonomic principles, not just marketing claims.
What Causes Lower Back Pain While Sitting?
Long hours at a desk amplify small discomforts into chronic pain. The lower back, or lumbar region, is vulnerable because:
- Most chairs don’t match your actual body dimensions.
- Lumbar support range on many chairs is too limited or incorrectly positioned.
- Armrests often lack adjustability, forcing unhealthy shoulder and upper back tension.
- Seating surfaces cause uneven pressure distributions, leading to soreness and fatigue.
- People tend to slump without realizing it, especially when chairs don’t actively promote good posture.
If these sound familiar, you’re not alone—and the good news is that reasonable, targeted adjustments can help a lot. Let’s look closer at three fixes that really work.
See also: How to Set Up a Home Office for Back Pain Prevention
Fix #1: Optimizing Chair Fit (Seat Depth and Lumbar Adjustability)
Why it matters:
Many office chairs come “one size fits all,” but the truth is that seat depth matters a lot. Seat depth means how far back your thighs rest on the chair. Too deep, and the front edge presses into the back of your knees, restricting blood flow and causing you to slouch to relieve pressure. Too shallow, and there’s not enough support, increasing strain on your hips and lower spine.
Likewise, lumbar support needs to be adjustable—not just in height but depth or firmness—to suit your natural curve. Chairs with a narrow or fixed lumbar bulge often push your back uncomfortably.
How to get it right:
- Measure your thigh length (from the back of your buttocks to the inside of your knee). Aim for a seat depth that leaves 1–2 inches (2.5–5 cm) of space behind your knees.
- Check lumbar support adjustability. A vertical range that covers 3–5 inches (7.5–12.5 cm) plus adjustable firmness options can match most body types.
- Sit in the chair and test different positions. Ideally, the lumbar bulge should rest firmly in the small of your back, following its natural “S” curve.
Impact:
Matching seat depth and lumbar support helps maintain a neutral spine position, leading to less muscle fatigue and pain after hours. It also encourages more upright, healthy postures.
Fix #2: Prioritize 4D Armrests for Shoulder and Upper Back Relief
Why it matters:
Armrests that only move up and down are sometimes marketed as adjustable, but the real ergonomic difference comes from 4D armrests. These allow adjustment in height, width (distance from your body), depth (front-back), and pivot (angle tilt).
Why does that matter? Because your shoulders and upper back connect your arms to your torso, and the wrong armrest position can cause you to hunch forward or strain upward, indirectly worsening lower back tension.
How to get it right:
- Adjust the armrest height so your elbows form roughly a 90-degree angle when typing, keeping shoulders relaxed.
- Set the armrest width to gently support your elbows without pushing your arms out too wide or crushing inward.
- Adjust armrest depth so your forearms rest comfortably without reaching or collapsing wrists.
- Pivot armrests to align with your natural forearm angle to avoid wrist or shoulder torque.
Impact:
4D armrests support a more open, relaxed shoulder posture, reducing compensations that travel down the back. Chairs with limited armrest adjustability tend to push users into awkward poses that can increase spinal strain.
Fix #3: Use Pressure-Mapping and Posture Feedback Tools to Guide Changes
Why it matters:
Pressure mapping is a technology that measures how your weight distributes on the chair cushion and backrest. Uneven pressure — either hotspots (too intense) or gaps (too little contact)—can indicate areas of poor support causing discomfort or forcing you into unhealthy postures.
Many chairs and workstation setups come with manufacturer claims about “pressure relief” or “ergonomic foam,” but you won’t know until you see pressure distribution data or monitor your own posture objectively.
How to get it right:
- Consider a seat pressure-mapping service or consumer device that shows how your chair supports you.
- Look for even pressure distribution along your ischial tuberosities (sit bones) and lumbar spine contact.
- Use posture feedback tools (apps or wearable devices) to detect when you slump or twist out of alignment.
- Adjust your chair’s tilt, recline, or padding based on these data points until you achieve more balanced pressure.
- Combine with regular breaks and stretches to maintain mobility—pressure mapping alone is not a magic bullet.
Impact:
Pressure mapping offers unbiased data showing if your chair truly supports your back over long periods. It clarifies why some chairs “feel good” at first but lead to pain after hours. Regular feedback helps you learn and maintain healthier sitting habits.
Comparison Table: Key Ergonomic Features and Their Role in Reducing Lower Back Pain
| Feature | What It Does | Ideal Range/Spec | Impact on Lower Back Pain | Notes |
|---|---|---|---|---|
| Seat Depth | Matches thigh length for proper thigh support and knee clearance | Leaves 1–2 inches behind knees | Reduces pressure on thighs, encourages good posture | Too deep causes pressure behind knees; too shallow means poor support |
| Lumbar Adjustability | Allows correct positioning of lumbar curve support | Vertical range 3–5 inches, firmness adjustable | Maintains natural spinal curve, reduces muscle strain | Fixed lumbar supports often miss individual needs |
| Armrest Adjustability (4D) | Adjust height, width, depth, angle | Elbows approx. 90 degrees; armrests close but not constraining | Supports shoulders and upper back, indirectly easing lumbar load | Limited armrests force compensations that increase spinal load |
| Pressure Mapping Feedback | Measures seat and back contact pressure distribution | Even pressure distribution along sit bones and lumbar area | Identifies pressure points that cause discomfort/pain | Helps guide personalized chair setup beyond marketing claims |
| Posture Feedback Tools | Detects real-time slouching or misalignment | Alerts users to reset posture periodically | Promotes long-term healthy sitting habits | Helps avoid fatigue buildup unnoticed by the user |
Common Pitfalls to Avoid
- Ignoring fit and relying on “good enough”: Marketing hype often suggests the latest chair automatically resolves pain. In reality, chairs must be personalized for your size and curves.
- Settling for partial armrest adjustability: Armrests adjustable only vertically can still force shoulder tension.
- Skipping chair testing under real conditions: Trying a chair for 10 minutes in a store or workstation is not the same as eight hours at a desk.
- Neglecting breaks: Even the best setup can’t replace occasional standing, stretching, and moving.
- Overlooking mattress-like cushions: Soft chairs without firm lumbar support might feel cushy initially but fail over time.
Frequently Asked Questions
Q: How can I measure seat depth to know if my chair fits?
A: Sit with your back against the chair and ensure there is roughly a 1-2 inch gap between the front edge of the seat and the back of your knees. You can use a tape measure or ruler to check this while seated.
Q: Is 4D armrest adjustability necessary for everyone?
A: While not strictly required, 4D armrests allow the most customized arm positioning. This helps reduce shoulder tension that indirectly contributes to lumbar discomfort, making it especially important for people who spend over 6 hours a day at their desk.
Q: What’s the most practical way to use pressure mapping without expensive equipment?
A: Start by listening to your body’s signals—pain, numbness, or pressure spots. If possible, test chairs that provide pressure mapping demonstrations or use affordable posture reminder apps. Small seat cushions with pressure relief properties may also help if chairs aren’t adjustable.
Lower back pain from chair use is rarely fixed by one change. Instead, focus on fit that respects your body shape, armrest adjustability that promotes whole-body relaxation, and data-driven feedback to fine-tune your setup. Over time, these fixes can make daily deskwork not only pain-free but more productive.
Related reading
- Ergonomic Chair Features to Look for in 2024
- 33. The actual ergonomic setup checklist: 10 minutes, permanent fix
- Ergonomic Office Chairs Designed for Long Hours at Work
- How Chairwise Chairs Help Alleviate Sciatica and Hip Pain
- Choosing the Best Ergonomic Chair for Long Home Office Hours
Our picks worth a closer look
- Ergonomic Office Chair for Long Hours Sitting – Back & Neck Pain Relief, AdjustaCheck on Amazon → — see current price and specs.
- KWKSV 500Lbs Big and Tall Office Chair,Comfy Heavy Duty Executive Chair with AdjCheck on Amazon → — see current price and specs.
- QLTPLUS Office Desk Chair for Long Hours & Back Pain Relief – 4“ Thick Molded FoCheck on Amazon → — see current price and specs.
- 750lbs Big and Tall Office Chair with Wide Thick Seat Cushion,Ergonomic Mesh OffCheck on Amazon → — see current price and specs.
- FlexiSpot E7 Pro Plus Electric Standing Desk 55x28Check on Amazon → — see current price and specs.