Monitor Arms with Swivel and Tilt for Maximum Flexibility

By Nate Frost · Senior Editor
Published May 12, 2026 · Last reviewed May 12, 2026
Monitor Arms with Swivel and Tilt for Maximum Flexibility
If you spend long hours at your desk and find yourself struggling to get the perfect monitor position, you’re not alone. A fixed monitor stand often means awkward neck angles, eye strain, and overall discomfort after several hours of work. A monitor arm with swivel and tilt capabilities provides a practical ergonomic solution to adjust your screen seamlessly throughout the day. Understanding how to choose and use these arms effectively can transform your workstation into a harmonious and flexible setup that supports your body rather than strains it.
See also: Monitor Arm Positioning Tips to Avoid Neck and Eye Strain
What Are Monitor Arms with Swivel and Tilt?
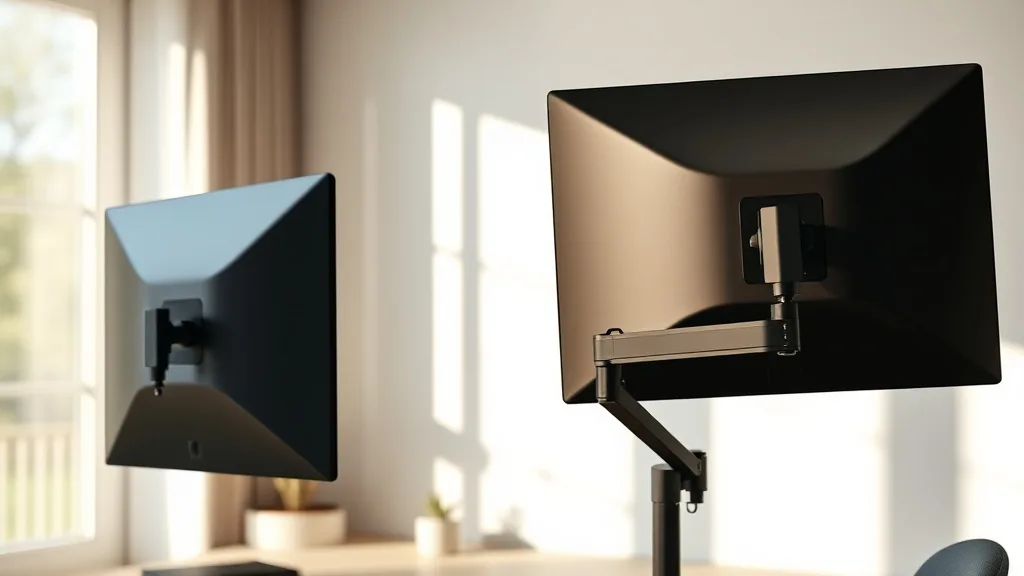
A monitor arm is an adjustable mounting system that replaces the traditional monitor stand, allowing you to reposition your screen with ease. Swivel and tilt are two fundamental movement features:
- Swivel lets you rotate your monitor left or right horizontally around a vertical axis.
- Tilt allows the screen to angle up or down vertically to match your line of sight.
Together, swivel and tilt give you the freedom to position your monitor at ideal viewing angles that reduce neck and eye strain. Many arms also allow height adjustment and rotation (pivot) for full 3D ergonomic control.
How Do Swivel and Tilt Monitor Arms Work?
Monitor arms use mechanical joints—often gas spring or friction-based—to enable smooth screen movement. The arm attaches to your desk via a clamp or grommet mount and connects to your monitor’s VESA mount (usually 75x75mm or 100x100mm).
Key components include:
- Swivel Joint: Located near the monitor, this joint allows horizontal rotation (left/right). Effective swivel typically ranges 90° to 180°, letting you share your screen with nearby coworkers or adjust the viewing angle when switching tasks.
- Tilt Joint: Allows vertical screen angle adjustment (usually from about -45° tilt down to +45° tilt up). This is crucial for minimizing glare and aligning the screen to your eye level.
Many monitor arms have separate joints for height adjustment and rotation to further customize your setup.
When to Use a Swivel and Tilt Monitor Arm
Swivel and tilt monitor arms are ideal for:
- Multi-purpose desks: When your workstation serves different tasks (e.g., coding, meetings, or paperwork), being able to quickly reposition your monitor improves comfort and productivity.
- Shared workspaces: In offices where desks are shared or visitors frequently view your screen, swivel allows easy side-to-side adjustment.
- Ergonomics for long hours: Proper tilt alignment reduces neck flexion or extension, helping prevent musculoskeletal discomfort over an 8-hour workday.
- Multiple monitors setups: Arms with swivel and tilt can be positioned to create seamless multi-screen arrangements without crowding your desk.
Key Features to Consider for Maximum Flexibility
When choosing a monitor arm with swivel and tilt, focus on the following to ensure it meets your ergonomic needs:
| Feature | Why It Matters | Ideal Specification or Range | Practical Notes |
|---|---|---|---|
| Swivel Range | Allows left-right rotation | At least 90°, preferably up to 180° | More swivel means more positioning options |
| Tilt Range | Adjusts vertical angle | Approximately -45° (down) to +45° (up) | Greater range handles more glare conditions |
| Weight Capacity | Supports your monitor’s weight | Match or exceed your monitor’s weight | Undersized arms cause sag, oversized unnecessary |
| VESA Compatibility | Fits your monitor’s mounting holes | Common: 75x75mm, 100x100mm | Check your monitor specs before purchasing |
| Height Adjustment | Aligns monitor to eye level | Adjustable via gas spring or friction | Important for spinal alignment |
| Arm Reach/Extension | Adjusts distance from desk | 15” to 25” is common | Longer reach offers more movement but may be bulky |
| Desk Mount Type | Determines installation method | Clamp vs Grommet mount | Clamp is flexible, grommet is more secure |
| Build Quality & Materials | Affects durability & smoothness | Strong aluminum or steel recommended | Cheaper models may have limited movement |
Common Pitfalls and How to Avoid Them
1. Buying an arm that does not support your monitor’s weight:
Insufficient weight capacity causes the arm to sag and lose positioning over time. Always check your monitor’s weight and choose an arm rated equal or slightly higher.
2. Overlooking desk compatibility:
Your desk thickness and mounting options can limit your choices. Clamp mounts work on desks up to a certain thickness, while grommet mounts require existing holes or drilling.
3. Neglecting ergonomic fit:
A monitor arm that lacks height adjustment or has limited tilt range won’t prevent discomfort. Prioritize models that allow precise vertical positioning and tilt angles to suit your posture.
4. Overemphasizing marketing claims:
Ads often promise “universal fit” or “infinite adjustability” but real-world use reveals limits. Test or read user experiences specifically about stability and range of motion during an 8+ hour workday.
5. Ignoring cable management:
Monitor arms often include cable routing channels. Without them, messy cables can restrict movement or create desk clutter.
How to Properly Set Up and Use a Swivel and Tilt Monitor Arm
- Check Compatibility: Confirm your monitor’s VESA pattern and weight to select a compatible arm.
- Install Securely: Attach the arm to your desk using the clamp or grommet mount. Make sure it is tight and stable.
- Attach Your Monitor: Use appropriate screws for the VESA mount ensuring a secure fit.
- Adjust Height First: Position the screen height so the top third of the monitor is roughly at your eye level when sitting.
- Tilt Screen: Tilt the monitor forward or backward to reduce screen glare and maintain natural neck posture.
- Swivel for Task Switching: Rotate the screen to accommodate multiple viewing angles or sharing.
- Fine Tune Distance: Adjust the arm’s reach to keep the monitor about an arm’s length away.
- Organize Cables: Use built-in cable guides to prevent tangling and ensure smooth movement.
Comparing Monitor Arms with Swivel and Tilt: What Fits Your Needs?
| Feature | Budget Option | Mid-Range Option | High-End Option |
|---|---|---|---|
| Swivel Range | 90° | 180° | 180°+ with tighter friction control |
| Tilt Range | -30° to +30° | -45° to +45° | -45° to +45° with smooth gas spring |
| Weight Capacity | Up to 15 lbs (7 kg) | 15-25 lbs (7-11 kg) | 20-30+ lbs (9-14 kg) |
| Height Adjustment | Limited | Gas spring for easy adjustment | Gas spring plus counterbalance |
| Mount Type | Clamp only | Clamp and grommet | Clamp and grommet |
| Cable Management | Basic clips | Integrated routing channels | Integrated routing and cover strips |
| Material & Build | Plastic-heavy | Aluminum with some plastic parts | Mainly aluminum or steel |
| Price Range | $30 - $70 | $70 - $150 | $150 and up |
Conclusion
A monitor arm with swivel and tilt is a cornerstone of ergonomic desk setups, giving you the essential flexibility to fine-tune your screen position for comfort, productivity, and long-term musculoskeletal health. To get the most out of your purchase, prioritize an arm that matches your monitor’s specifications, offers a suitable adjustment range, and fits your desk environment. Remember that real-world usability over an eight-hour workday matters more than flashy marketing claims. By carefully selecting and properly setting up your monitor arm, you can prevent strain and make your long hours at the desk significantly more comfortable.
Frequently Asked Questions
Q: What is the ideal height position for a monitor on a swivel and tilt arm?
A: The top third of the screen should be roughly at eye level when you are seated comfortably, so you can look slightly downward at the center of the display without bending your neck.
Q: Can I use multiple swivel and tilt arms on one desk?
A: Yes, many arms are designed to be used in multi-monitor setups. Just ensure your desk can support the total weight and the arms do not interfere with each other’s range of motion.
Q: How do I know if my monitor is VESA compatible?
A: Check the back of your monitor for four screw holes arranged in a square pattern (usually 75x75mm or 100x100mm). Your monitor’s manual or manufacturer website will also specify VESA compatibility.