
Creating a Balanced Lighting Scheme for Video Calls

By Nate Frost · Senior Editor
Published May 12, 2026 · Last reviewed May 12, 2026
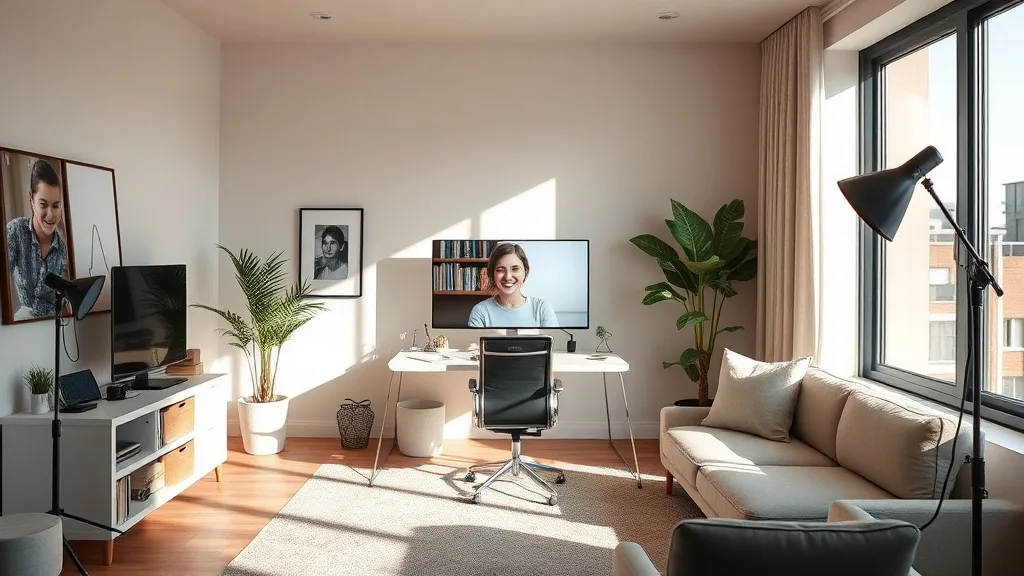
Creating a Balanced Lighting Scheme for Video Calls
If you spend hours on video calls for work, you’ve likely noticed how lighting can make or break your on-camera presence. Harsh shadows, glare, or uneven lighting can cause eye strain and create an unprofessional look that distracts colleagues. The challenge is creating a balanced lighting setup that’s comfortable to work with for 8+ hours a day and looks natural on camera, all while avoiding common marketing promises that often oversimplify the problem. This guide digs into practical, ergonomic lighting strategies that actually work in real-world desk setups.
See also: Setting Up Lighting to Reduce Glare on Computer Screens
What Is Balanced Lighting for Video Calls?
Balanced lighting in video calls refers to achieving an even, natural, and flattering illumination on your face and workspace without causing glare or visual fatigue. It involves combining multiple light sources and controlling their intensity, position, and color temperature to mimic how the human eye perceives in-person meetings.
Unlike simply having a “bright desk lamp” or just your overhead room light, a balanced lighting scheme manages:
- Key light – the main source of illumination (usually positioned near the camera).
- Fill light – secondary lighting that softens shadows from the key light.
- Backlight or hair light – separates you from the background, adding depth.
- Ambient light – general room lighting preventing stark contrasts.
The goal is to feel comfortable during extended working hours while appearing natural on video calls without harsh shadows or overexposure.
How to Create Balanced Lighting for Video Calls: 6 Practical Steps
1. Assess Your Workspace Lighting and Camera Position
Start by evaluating your current natural and artificial lighting conditions:
- Note where windows are and their impact during your work hours (morning/evening sun).
- Identify overhead light sources and their color temperature (cool white, warm yellow, etc.).
- Check your camera angle relative to light sources.
Avoid placing bright windows or lights directly behind you to prevent silhouetting.
2. Choose the Right Type of Lights
For video calls, small LED panels or adjustable desk lamps often work best since they:
- Offer flicker-free, consistent light output.
- Allow brightness and color temperature adjustments.
- Can be positioned close to your video camera.
Avoid direct white bulbs pointed at your face, which cause glare and fatigue, or bare filament bulbs creating harsh shadows.
3. Use 3-Point Lighting as a Framework
Adapting a classic photography/video setup helps balance your lighting:
| Light Type | Placement | Purpose | Example Position |
|---|---|---|---|
| Key Light | Slightly above and to the side of the camera (45° angle) | Primary illumination, facial definition | Desk lamp or LED panel on left/right side of monitor |
| Fill Light | Opposite side of key light, lower intensity | Softens shadows cast by key light | Small desk lamp or ring light with dimmer control |
| Backlight | Behind you, above shoulder height | Adds depth and separates you from background | Clip-on light on shelf or subtle floor lamp |
This setup removes harsh shadows, prevents flat images, and improves video quality without creating glare.
4. Control Color Temperature for Comfort and Natural Look
Color temperature is measured in Kelvins (K):
- Use 4000-5000K (neutral to cool white) for a clean, bright look similar to daylight.
- Avoid mixing warm (2700K) and cool (6500K) lights, which confuse your camera’s white balance.
- Adjustable color-temperature lights let you fine-tune based on ambient light or time of day.
Consistent, neutral lighting is easier on the eyes over long periods and reduces the headache-inducing flicker or harsh contrasts often seen in cheap lighting solutions.
5. Manage Brightness and Glare
Your lighting shouldn’t be:
- Too bright, causing you to squint or wash out on camera.
- Too dim, resulting in grainy video quality or eye strain.
Use dimmers or multiple low-intensity light sources instead of one high-intensity bulb. Position lights behind the camera or above your monitor, aimed indirectly, with diffusers or lampshades to scatter light gently.
6. Consider Your Background Lighting and Environment
A well-lit background prevents your video from looking overly contrasty or distracting. Harsh shadows or bright spots on walls can compete with your face for attention.
Use soft ambient room lighting or subtle backlighting behind you. Avoid direct light sources visible in your camera frame. Natural, soft backgrounds enhance focus on you and complement balanced foreground lighting.
Why Proper Lighting Matters for Desk Workers
You might assume that you only need lighting for video clarity, but good lighting also plays a significant ergonomic role during hours at your desk:
- Reduces eye strain: Balanced illumination keeps your pupils from constantly adjusting between extremes.
- Supports correct posture: Without glare forcing awkward neck/facial angles to avoid shining reflections.
- Improves circadian rhythm: Consistent natural-like light prevents fatigue over long days.
- Enhances communication: Clear vision of facial expressions improves remote collaboration.
Measurement tools like a lux meter or simple smartphone apps can help quantify how much light hits your face, aiming for 100-200 lux for video call setups depending on ambient conditions.
Marketing Claims vs. Real-World User Experience
Many lighting product descriptions promise “studio-quality” or “daylight perfect” light with fancy buzzwords. The reality is:
- Adjustability is key: Fixed, overly bright, or overly warm lights rarely suit all times of day and room conditions.
- Positioning trumps wattage: A 5W LED positioned well can outperform a 20W bulb awkwardly placed.
- Human variability: What looks good for a 10-minute call may tire your eyes over 8 hours.
Testing and tuning your lighting scheme with real extended use is essential. Avoid choosing setups just based on glossy marketing photos.
Comparison Table: Common Desk Lighting Options for Video Calls
| Lighting Type | Pros | Cons | Best Use Case | Ergonomic Fit |
|---|---|---|---|---|
| Overhead Ceiling Light | General illumination, low cost | Can cause shadows and glare | Supplement ambient light | Poor for direct face illumination |
| Desk Lamp (Adjustable) | Focused light, adjustable | Single source may create shadows | Key or fill light near monitor | Good if positioned carefully, but needs diffuser |
| LED Ring Light | Even, flattering facial light | Fixed position, sometimes harsh | Solo key light for video calls | Adjustable brightness/color crucial for comfort |
| LED Panel Light | Flicker-free, adjustable temp | Higher upfront cost | 3-point lighting or key light | High ergonomic potential with dimmers and diffusers |
| Natural Window Light | Soft, flattering, free | Inconsistent, glare risk | Supplement ambient light | Good when balanced with artificial sources |
Frequently Asked Questions
Q: Can I just use my overhead room light for video calls?
A: Usually not ideal. Overhead lights tend to cast shadows under your eyes and nose, making you look tired. Adding a front-facing key light can improve your on-camera appearance dramatically.
Q: How important is adjustable color temperature?
A: Very. Your ambient and daylight change throughout the day. Adjustable lights allow you to maintain consistent, natural-looking skin tones and reduce eye strain during long calls.
Q: Will increasing light brightness always make me look better on camera?
A: No, too much brightness causes glare and washed-out features. Balanced, soft lighting with shadow control typically looks best and feels comfortable over hours of work.
By investing effort into creating a balanced lighting scheme with ergonomic adjustments and realistic expectations, desk workers can improve both their comfort and professionalism during the lengthy video calls that define modern work life.